
Building a network
Start a project, draw rain gages, subcatchments, junctions, outfalls, storage units, conduits, pumps and flow regulators, and set their properties.
Start a project in the right units
Choose the units before you draw anything, because every length, depth and flow you type is read in the project's units.
| Command | Flow units | Lengths and map |
|---|---|---|
| File > New (SI units), the New toolbar button, or New project (SI) in the Start window | LPS (litres per second) | Metres; areas in hectares |
| File > New (US units) | CFS (cubic feet per second) | Feet; areas in acres |
Both start with Horton infiltration, dynamic wave routing, depth offsets, a one day simulation from 01/01/2024, a 15 minute reporting step and a 20 second routing step. Change any of these in Project > Simulation Options..., described in Running a simulation.
Draw objects on the map
Pick a tool on the toolbar (or press Add under the Browser's list for that category), then click the map. A tool stays active, so you can place several objects in a row; click Select Object when you are done. Each new object gets the next free ID: J1, J2 for junctions, C1, C2 for conduits, S1 for subcatchments, RG1 for rain gages, and so on. Nodes share one set of IDs and links another, as in SWMM.
| Object | How to draw it |
|---|---|
| Junction, outfall, flow divider, storage unit, rain gage | One click where it goes. |
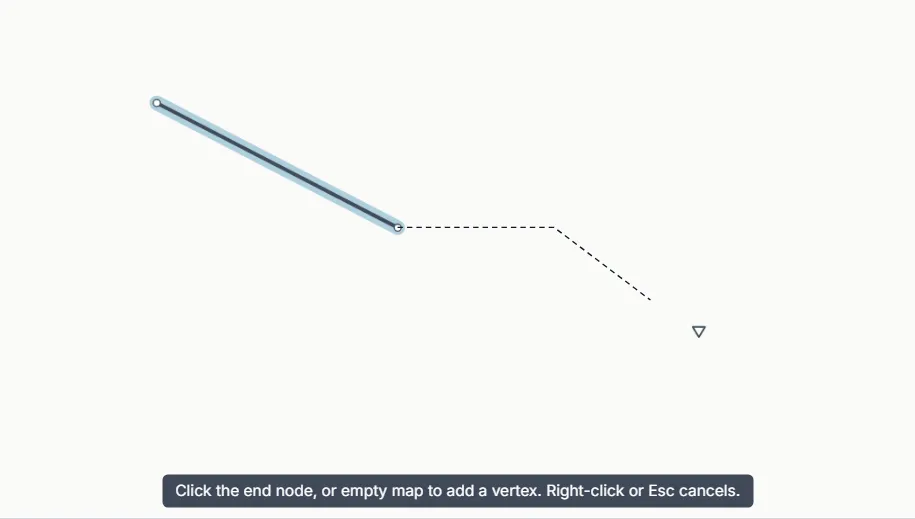
| Conduit, pump, orifice, weir, outlet | Click the upstream node, then the downstream node. For a conduit, clicks on empty map in between add bend points. Right-click or Esc cancels a link you have started. |
| Subcatchment | Click each corner of its outline. Double-click, press Enter, or click the first corner again to close it. Esc cancels. |
| Map label | Click where it goes, type the text, press Enter. |
A hint at the bottom of the map says what the next click does while a link or outline is being drawn.
Which object to use
| Object | Use it for |
|---|---|
| Rain gage | The rainfall that falls on the subcatchments assigned to it. See Rainfall and design storms. |
| Subcatchment | A piece of land that turns rain into runoff and sends it to one outlet node (or another subcatchment). |
| Junction | A manhole, or any point where drains meet. Its invert is the lowest point; its maximum depth is invert to rim. |
| Outfall | The end of the system: a river, a nallah, an STP inlet. An outfall may have only one link. |
| Flow divider | A node that sends part of its inflow down a chosen link (CUTOFF, OVERFLOW, TABULAR or WEIR). |
| Storage unit | A wet well, pond or tank, with a shape that gives its surface area at each depth. |
| Conduit | A pipe or open drain. |
| Pump | A pump lifting flow from its inlet node to its outlet node, on a pump curve. |
| Orifice, weir, outlet | Flow regulators: an opening in a wall or floor, an overflow crest, or a rating curve between depth (or head) and flow. |
Set properties
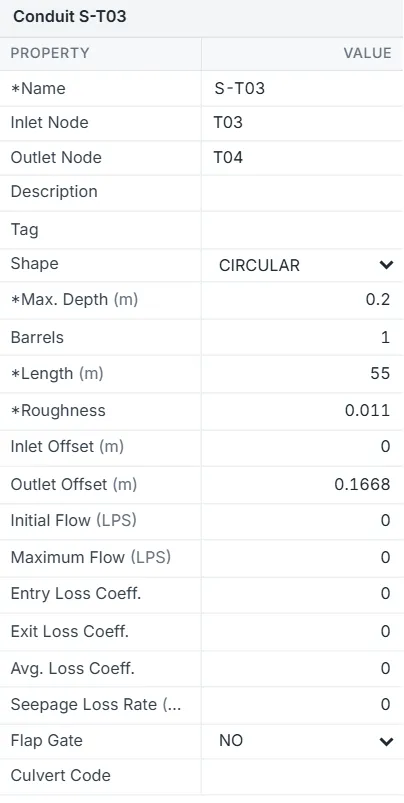
Click an object with Select Object and type its values in the Property Editor. The rows follow the SWMM 5.2 manual. The ones engineers change most:
| Object | Key properties |
|---|---|
| Junction | Invert El., Max. Depth (invert to rim), Initial Depth, Surcharge Depth, Ponded Area. |
| Outfall | Invert El., Tide Gate, Type: FREE, NORMAL, FIXED (with Fixed Stage), TIDAL (with a tidal curve) or TIMESERIES. |
| Storage unit | Max. Depth, Evap. Factor, Seepage with suction head, conductivity and initial deficit, and Storage Shape: FUNCTIONAL, TABULAR (a storage curve), CYLINDRICAL, CONICAL, PARABOLOID or PYRAMIDAL. |
| Conduit | Shape and its size, Barrels, Length, Roughness (Manning n), Inlet Offset and Outlet Offset, entry, exit and average loss coefficients, Flap Gate. |
| Pump | Pump Curve (* means an ideal pump with no curve), Initial Status ON or OFF, Startup Depth and Shutoff Depth at the inlet node. |
| Orifice | Type SIDE or BOTTOM, Shape CIRCULAR or RECT_CLOSED, Height and Width, Inlet Offset, Discharge Coeff., Flap Gate, Time to Open/Close. |
| Weir | Type TRANSVERSE, SIDEFLOW, ROADWAY, V-NOTCH or TRAPEZOIDAL, Height, Length, crest Inlet Offset, Discharge Coeff., end contractions, Can Surcharge. |
| Outlet | Inlet Offset, Flap Gate, Rating Curve: FUNCTIONAL/DEPTH or FUNCTIONAL/HEAD (coefficient and exponent) or TABULAR/DEPTH or TABULAR/HEAD (a rating curve). |
| Subcatchment | Rain Gage, Outlet, Area, Width, % Slope, % Imperv, Manning n and depression storage for the impervious and pervious parts, and the infiltration parameters for the method chosen. |
Cross sections
A conduit's Shape list holds SWMM's shapes: CIRCULAR, FORCE_MAIN, FILLED_CIRCULAR, RECT_CLOSED, RECT_OPEN, TRAPEZOIDAL, TRIANGULAR, the ellipse, arch, egg and horseshoe families, CUSTOM (from a shape curve), IRREGULAR (from a transect) and STREET. Max. Depth is always the full height: the internal diameter of a circular pipe, the depth of an open drain. The rows under it change with the shape, for example Top Width for RECT_OPEN and Base Width, Left Slope and Right Slope for TRAPEZOIDAL.
Offsets are read the way Link Offsets in the simulation options says: as a height above the node invert (DEPTH, the default) or as an elevation (ELEVATION). The status bar shows which.
Inflows
The Inflows row of a node shows what it receives from the .inp file: direct inflows, dry weather flow and RDII. The row is read only: DrainPilot has no editor for inflows. To add or change dry weather flow or a direct inflow, edit the [DWF] or [INFLOWS] section of the .inp file in a text editor and open the file again.
Move, rename and delete
- Drag a node, rain gage or label with Select Object to move it, or type its X-Coordinate and Y-Coordinate.
- Rename an object by typing a new Name. Links, subcatchments and other objects that refer to it follow the new name; control rules are text and are not rewritten. An ID cannot contain spaces, quotes or semicolons.
- Delete the selected object with Del, the Delete toolbar button or Edit > Delete. Deleting a node also deletes the links joined to it and clears it as the outlet of any subcatchment. There is no confirmation: use Edit > Undo (Ctrl+Z) to bring it back.
Title, notes and control rules
Project > Title/Notes... edits the project title (the first line) and notes. Project > Control Rules... edits SWMM control rules as text, in SWMM 5.2 syntax (RULE, IF, THEN, ELSE, PRIORITY). SWMM checks the rules when the simulation runs, so a mistake shows up as a run error.